
Have you ever had one of those days where you just need something comforting without caring about calories? Well, I have those days. And on those days, a guilty blondie is one of my go-to… More
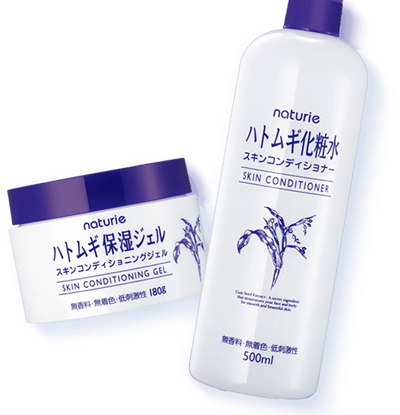
Tried and Tested: Japanese Fan-Favourite, Hatomugi
Look at the size of these beauties! Really appealing to those on a budget like myself! (Image: Google)
So how exactly did this Japanese fan-favourite end up in my wish-list?
I started getting curious about these products after seeing it in an article by Female Magazine! They described it as one of those multi-use Japanese products for girls that are always rushing for time. And let’s face it, all of us want maximum benefits with minimum effort right? Well, that’s me hahaha.
I was really intrigued because they weren’t called a toner and a moisturizer, which most of us would call them, but a skin conditioner and beauty serum. When I read the words beauty serum on the translated label at the back, I was like, “hold up! A serum to make me beautiful??” I had to have it.
After keeping my eyes peeled for a while, I finally found these products in Sasa and Aeon Supermarket (1st Floor, with all the other beauty and skincare products) at only RM 60 for both (which is an absolute steal (!) considering their size.
Here’s a quick breakdown of each product:
Skin Conditioner (basically a toner), 500 ml:
What it claims: a multi-action conditioning face and body treatment that targets various kinds of skin problems like large pores, fine lines and aging skin. A moisturizing and non-sticky lotion that provides ample moisture to the skin. For best results, pour a generous amount onto cotton pads and apply it as a mask for approximately 5 to 10 minutes daily (which I did try, especially the week after my facials to help close my pores after extraction)
What I love: It is extremely lightweight, fluid and non-sticky just as it claims to be! Once you apply it, it dries within seconds and you’re ready to apply your next step.
What I didn’t enjoy: As for the claim of deep hydration, pore tightening and anti-aging, I didn’t see or feel any of that. Currently two-thirds through this 500 ml bottle and honestly now I continue to apply it only out of diligence.
Would I repurchase? It’s not something I feel I NEED in my routine. It wasn’t anything bad, I just didn’t see any results using it.
Beauty Serum (basically what we call a moisturizer), 180 g:

As you can see, it looks like a clear gel (Image: Pinterest)
What it claims: Moisturizing, high penetration formulation with natural pearl barley extract in gel form. Penetrates right away to fill the skin with moisture for a supple feel without stickiness. Stays firmly on the surface of the skin and holds moisture in without relying on oils.
What I love: It is super lightweight and non-sticky as they claim! It is the only moisturizer I can apply all the way to my chest without worry of the oils or pimples. I honestly wasn’t expecting much considering they price but I enjoy using this a lot more than all those aloe vera gels that claim to be 99% pure. Comparatively, this gel moisturizer is a lot more moisturizing! Personally, it does not sit on my face as it claims, but that is actually a good thing to me. I feel like the gel actually absorbs into my skin.
What I didn’t enjoy: If I absolutely had to find something to complain about, I just didn’t feel I was getting enough moisture with this product. It was just a tiny bit lacking in that aspect.
Would I repurchase? Yes. I really enjoyed using this product. With its price point, I feel it is worth it and serves its purpose. It layers well with my other products and makeup and doesn’t get greasy. It is one product I can use generously and comfortably.
Have you tried out this product too? Share your thoughts with me!
*Please remember that these are my own thoughts and opinions and everyone’s skin is different and will react differently. Feel free to try these out yourself!
Dessert Roundup: Are they really worth the money?
Several weeks ago, I took a trip to Kuala Lumpur and indulged in some sweet treats! Here are some I thought were worth mentioning (for one reason or another):
1. The Tokyo Restaurant
i) 6th Avenue Cheese Cake (RM 19)
This was one of the items that was highly recommended.
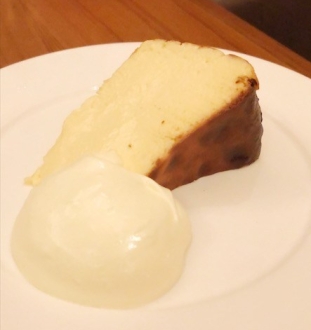
My Rating: 3.5/5
Would I go back for it: Personally not something I would crave for just because the cheese flavour was too light. I personally prefer something a little denser.
ii) Gateau Chocolat Cake (RM 16)
This was my favourite!
![HTEW1860[1]](https://rebeccagemmasu.files.wordpress.com/2018/08/htew18601-e1533735459863.jpg?w=340&h=345)
My Rating: 5/5
Would I go back for it: YES. The rich chocolate flavour is delicious and rich without being too sweet. It has a bittersweet flavour from the chocolate which I really enjoy.
iii) Classic Tiramisu (RM 18)
![JAQG8995[1]](https://rebeccagemmasu.files.wordpress.com/2018/08/jaqg89951-e1533735567982.jpg?w=407)
My Rating: 3/5
Would I go back for it: No. This was really average for me.
2. Nana’s Green Tea
i) Matcha Nama Chocolate Parfait (RM 24.50)
![NQFI7915[1]](https://rebeccagemmasu.files.wordpress.com/2018/08/nqfi79151.jpg?w=410&h=546)
My Rating: 4/5
Would I go back for it: Yes, but not too soon as it is on the heavier side. Definitely for sharing.
ii) Matcha Hotcake (RM 18.50)
![FFLD8287[1]](https://rebeccagemmasu.files.wordpress.com/2018/08/ffld82871.jpg?w=488&h=391)
My Rating: 3/5
Would I go back for it: Not really. They’re good pancakes, just nothing out of the oridinary.
3. Godiva
We had a fan favourite; their chocolate soft serve ice cream (RM 22.50)

My Rating: 1/5
Would I go back for it: No. This was seriously underwhelming. I’m not sure if we got a faulty batch or if we were expecting too much. The ice cream we had was icy and grainy with little to no chocolate flavour or creamy richness. Extremely disappointing for us considering the price.
4. Häagen Daaz
Belgian Chocolate Ice Cream in a cone (RM 18.50)
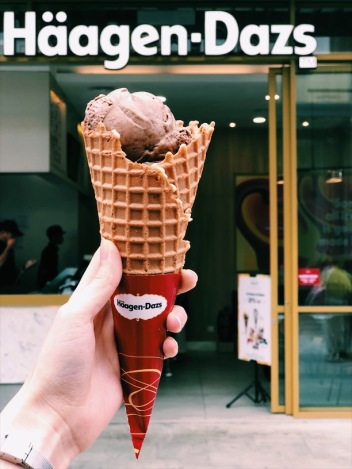
My Rating: 5/5
Would I go back for it: Yes! We had it twice during our trip because we couldn’t get enough.
5. VCR, Bangsar
French Toast (RM 19)
This is not just any normal french toast but espresso no churn ice cream, brioche french toast, raspberry compote, crumbles and mocha sauce.
![PHTE6707[2]](https://rebeccagemmasu.files.wordpress.com/2018/08/phte67072-e1533735849701.jpg?w=382&h=412)
My Rating: 5/5
Would I go back for it: Yes! Each element on its own might be a little overpowering but when eaten together, it is delicious! Not to mention, the atmosphere in the cafe on the weekends is really lively and exciting.
6. Krispy Kreme
I cannot remember what flavours we tried but there were 2 chocolates and 1 cheese cake (which we gobbled before we could take a picture of). I always thought there wouldn’t be a big difference between our Big Apple Donuts and Krispy Kreme but boy was I wrong! They’re better! Rich and delicious without being too sweet!
![CLGB5699[1]](https://rebeccagemmasu.files.wordpress.com/2018/08/clgb56991.jpg?w=380&h=506)
My Rating: 4/5
Would I go back for it: Yes. Great snack.
7. Cinnabon
It’s been a long time since I saw anyone mention Cinnabon but they remind me of my childhood when I used to go to KL with my parents. The smell of fresh cinnamon rolls would waft through the mall and my parents would get us some to share.
![CXPQ6611[1]](https://rebeccagemmasu.files.wordpress.com/2018/08/cxpq66111.jpg?w=285&h=539)
Once I got a whiff of the familiar cinnamon buns, I knew I had to have it!
![FAOI8241[1]](https://rebeccagemmasu.files.wordpress.com/2018/08/faoi82411.jpg?w=380&h=506)
i) Cinnabon (Original)
My Rating: 4/5
ii) Chocobon
My Rating: 5/5
Would I go back for it: I would definitely go back for the Chocobon! Gooey, Salty, Sweet, Sticky Cinnamon rolls with chocolate sauce, what’s not to love?!
All ratings and comments above are personal opinions. If you have a different opinion, to each his own. If you have anything you would like to recommend, please share it with me! I’m always down for some food!
My Ride or Die Makeup Product
The one product I absolutely cannot live without is Make Up For Ever’s Ultra HD loose powder!
Photo from: http://www.sephora.my
Here’s how I came across it:
I came across this product by accident more than a year ago when I walked into Sephora with 1 mission in mind; to solve my oily t-zone! Before discovering this product, I could put on my daily skincare and minimal makeup, walk out the door feeling fantastic only to find that my t-zone became oily within 2 or 3 hours.
I started sourcing setting powders and many of my friends recommended Innisfree’s no sebum mineral powder. Though this worked well, it didn’t last long. Within 3 to 4 hours, my t-zone became oily again. Reapplying the powder on top of my oily skin only gave me small whiteheads and pimples at the end of the day which would then take about 2 days for me to cure. I did more research and headed to Sephora. I wasn’t sure what to search for as I didn’t have much experience with makeup at the time. I headed for the Laura Mercier shelf to try their mineral finishing powder which had great reviews! I didn’t dislike it but I also wasn’t blown away. I kept searching.
I walked over to the Makeup Forever shelf which was a brand few of my friends ever mentioned. I saw they had several options and the words “Ultra HD” really stood out to me. I picked up the product and my first thought was that I loved the packaging; really sturdy and of a good size. I opened it up, touched the powder and fell in love…
Why I love it:
- My face stays matte ALL DAY LONG.
- The texture is SO SOFT and LIGHT, almost like air.
- It sets my makeup beautifully without looking cake-y.
- I could use it, go for an important event in the sun and not have to worry that my makeup would melt off my face.
- It is translucent and can be used by all skin colours/ tones.
- A little goes a long way. I touch my makeup brush in some product and knock it off until it’s barely visible and apply it to my face.
Don’t take my word for it.
Try it yourself!
For the month of July, tHe Spring Shopping Mall, Kuching is working together with Sephora for their Operation Recycle Campaign. Recycle 20 mineral water bottles (500ml) or aluminium cans (300ml) to redeem 4 free samples at Sephora.
They are giving out a choice of:
- Sephora eye sleeping mask or luggage tag
- A sample of Tarte’s maracuja crease-less concealer
- Sephora Triple Action Cleansing Water (25 ml)
- A choice of Make Up For Ever High Definition Powder or Caudalie Hand and Nail Cream or For Beloved One Face Mask (all mini sizes).
![QXIN5318[1]](https://rebeccagemmasu.files.wordpress.com/2018/07/qxin53181.jpg?w=265&h=345)
The products I chose at Sephora today!
The perfect opportunity to try out a new product and do something good for our environment! Win-win 😉
Hurry, cause it is only limited to 300 units!
Let me know if the product works for you or if you have any products to recommend! I would love to hear from you all.
Tried and Tested: Cookie Shots!
Hi Everyone!
This week’s post is going to be a little different. Okay, completely different. Sorry beauty junkies but this week, it’s going to be about food!
Over the weekend I celebrated my cutie pie’s birthday. He turned 23!
I thought hard what to get him for his 23rd Birthday. I didn’t want it to be anything cliché like balloons or whatever cause that’s just not what he’s into (but I never know. Sometimes he’s a princess).
And then it hit me! His favourite pick-me-up is milk and cookies so that’s what i gave him, but with a TWIST!
Several months back, I was scrolling through Instagram and came across a video by Tastemade for cookie shots and that’s what I want to share with you all today. It’s really fun and simple:
*Note: The recipe below is from Tastemade. The minor adjustments I made to suit my preferences in blue are optional.
Ingredients:
110 grams of Unsalted Butter (I used Salted butter cause I always like a tinge of salt in my desserts)
40 grams Caster Sugar (I cut this down to 30 grams)
40 grams Light Brown Sugar (I also cut this down to 30 grams)
1 Egg Yolk
185 grams Plain Flour
90 grams Chocolate Chips (a little extra wouldn’t hurt but not too much as this will make it hard for the dough to hold its shape in the moulds)
100 grams Dark Chocolate
Instructions
- Beat the butter and sugar together until light and fluffy, about 1-2 minutes.
- Once smooth, add the egg yolk and beat for another minute.
- Moving to a spatula, gently add the flour until just combined.
- Fold in the chocolate chips.
- Take a spoonful of dough and press it into the inside of your shot/fondant moulds covering all the edges.
- Once they are filled, place them in the fridge for 30 minutes.
- Bake in the oven at 180c for 15 minutes or until just golden. Allow to cool in the moulds.
- Once cooled, tap them out of the moulds. Melt the chocolate and paint this on the inside of the cookie and wait for it to completely set in the fridge.
- To serve, fill each shot with milk and enjoy!
![PBFP9083[1]](https://rebeccagemmasu.files.wordpress.com/2018/06/pbfp90831.jpg?w=478&h=358)
Although I made several mistakes with mine, these turned out great and the birthday boy loved them! It’s something I would make again so I thought i’d share them with you guys for your next party!
Things to take note of:
- Beware not to put too thick a layer of dough round the moulds as they will puff up, especially the bottoms.
- Make sure to have a brush small enough for the cookies to brush on the chocolate to avoid being messy.
- If you don’t have shot/fondant moulds, use lined paper cups like I did (see below). These make the job super easy.
- My chocolate layer on the cookies didn’t need to be set in the fridge. It set and stored well at room temperature. If your melted chocolate starts to set halfway, just pop it into the microwave for 20 seconds.
- Be sure to only pour in the milk right before serving to avoid the cookies from getting soggy.
Visuals for references:
*Note: I did a double of the above recipe because there’s never too much food.
![IMG_9023[1]](https://rebeccagemmasu.files.wordpress.com/2018/06/img_90231.jpg?w=220&h=294) This is my completed dough with less sugar and extra chocolate chips.
This is my completed dough with less sugar and extra chocolate chips.
![KNVN9880[2]](https://rebeccagemmasu.files.wordpress.com/2018/06/knvn98802.jpg?w=212&h=283)
![RIVB5070[1]](https://rebeccagemmasu.files.wordpress.com/2018/06/rivb50701.jpg?w=439&h=329)
The lined paper cups I used and the dough in the moulds.
![VZAI2836[1]](https://rebeccagemmasu.files.wordpress.com/2018/06/vzai28361.jpg?w=356&h=267)
They came out beautifully golden but some were too thick in the centre.
![FBNG6426[1]](https://rebeccagemmasu.files.wordpress.com/2018/06/fbng64261.jpg?w=319&h=425)
The finished product! They tasted great and were fun to eat!
I hope you all enjoyed a different topic this week. Let me know your feedback! 🙂
New Sephora Favourites!
I went to Sephora and let’s be honest, it’s incredibly hard to walk out empty handed.
Despite my tight budget, I managed to get myself some goodies during the recent member’s sale (note: i’m all about great bargains!). I’m going to skip all the minor items and jump straight to my two new favourites that I would recommend!
- Tarte’s Maracuja Oil (RM 50 for 15 ml, which lasts several months)
- Urban Decay’s Naked Skin Colour Correcting Fluid (Peach) (RM103 for 0.21 oz)
Let’s start with Tarte’s Maracuja Oil because I find it absolutely amazing that it only has 2, that’s right, TWO ingredients:
- passiflora edulis seed oil (amatuer terms: passionfruit)
- Passiflora edulis seed oil is commonly used for: skin soothing and antioxidants
- tocopherol (common vitamin E activity).
- Tocopherol is commonly used for its antioxidant properties.
The ingredients are completely organic and beneficial for the skin.
Claims: Helps balance and nourish all skin types and is packed with Vitamin C and essential fatty acids to firm, boost radiance, soften and hydrate skin without clogging pores.
Why I love it: It serves as a great night moisturizer and best of all, it doesn’t clog my pores! I wake up with hydrated and glowing skin. Sephora sells them in mini sizes at a great price as well so it’s worth a try!
As a side note: It isn’t the most fragrant oil. In fact, it almost smells like cooking oil but it doesn’t bother me because that means no unnecessary chemicals were added to the formula.
Now for my second favourite, Urban Decay’s Colour Correcting Fluid. I have THE MOST stubborn dark circles. I won’t go into a lengthy explanation on how many ways and products i’ve used to try to conceal them (even some holy grail concealers others swear by haven’t worked). My under eye circles are on the blue/ purple side so I got this in peach.
![IMG_E9011[1]](https://rebeccagemmasu.files.wordpress.com/2018/06/img_e90111.jpg?w=254&h=214)
Claims: Innovative, light-weight fluid that instantly colour corrects and blurs flaws, leaving skin illuminated and bright. Subtle pearlescent pigments diffuse light to perfect skin, while antioxidant rich Vitamin C and E condition and protect.
Why I love it: It helps conceal most of my darkness! I can’t quite explain the texture. It’s not creamy but it’s not a gel either. It blends easily and doesn’t settle into any fine lines (unlike many liquid products I have tried). It does have fine pearlescent pigments and works well under my concealer to subtly brighten my under eyes. It also helps my concealer last my whole 9-6 work day without creasing. I can’t vouch for its antioxidant claims as I have yet to see any improvement in that area but this is something I would repurchase.
![IMG_E9010[1]](https://rebeccagemmasu.files.wordpress.com/2018/06/img_e90101.jpg?w=381&h=503)
For the picture above, I applied concealer to both sides of my face. The under eye darkness is visibly less obvious on the left than on the right. Things to take note are that this photo was taken after a 9-6 day at work and no powder application or touch ups occurred during this time. And that’s the magic of Urban Decay’s Colour Correcting Fluid!!
I hope this review helps! If you have anything to recommend, let me know 🙂
Understanding: The Ordinary
A few weeks ago when I posted a picture of some The Ordinary products on my Instagram story, I got quite a few DM’s asking what it was. I think it’s safe to say that The Ordinary isn’t a common brand in East Malaysia.
Here’s how I got into it:
About a year ago, I started seeing the brand around social media among the many beauty influencers I follow but I didn’t pay it much attention because I tried to focus on the huge selection of products we have locally. That is until I saw it on @re_issue on Instagram.
@Re_issue is a Health and Beauty page on Instagram that compares several similar products in the market (highly recommended! Go check them out). What caught my eye was their post on 15 March on Vitamin C. I was shocked to find that The Ordinary’s Vitamin C suspension was the most affordable by far (imagine $5.80 vs $80) and had the highest Vitamin C concentration!
![IMG_8417[1]](https://rebeccagemmasu.files.wordpress.com/2018/06/img_84171-e1528210120326.png?w=332)
Above: Price Comparison 
Above: Vitamin C Concentration Comparison
I started looking for reviews on YouTube about The Ordinary but didn’t come across any reviews by influencers I normally follow and trust. I decided to pay their site a visit: https://theordinary.com/
Their homepage displayed their slogan: Clinical Formulations with Integrity, which already put my mind at ease (at that point, I had already decided I was going to make a purchase). I was just going to purchase a Vitamin C serum and be on my way. Little did I know how overwhelmed I was going to be. They had 8 types of vitamin C!

Thankfully their website is very comprehensive and I managed to make my decisions easily enough!
I purchased:
- Vitamin C Suspension 23% + HA Spheres 2% (Vitamin C Serum)
- Granactive Retinoid 2% in Squalane (Advanced Retinoid Complex)
Here’s a quick breakdown of each item:
- Vitamin C Suspension 23% + HA Spheres 2%: This is a water-free suspension that contains extremely high concentrations of Vitamin C (anti-oxidant and brightening). Upon application, the texture was really strange for me. It felt grainy and oily but I tried to accept it. It wasn’t uncomfortable for me per say but due to the texture, I recommend starting with just a small drop, rub it between your hands and then gently pat onto your face. Unfortunately, I did not dilute it when introducing it to my skin considering this is my first Vitamin C product (such a powerful one at that and incredibly prone to causing irritations) and after 2 days, my face was covered in small red bumps! It wasn’t itchy or uncomfortable but they were visible. After consulting some friends and also our great World Wide Web, it was deduced that the Vitamin C content was way too high for a first-timer. It hasn’t discouraged me though. I’m giving my skin a break and will try again soon! 🙂 The Ordinary has many other Vitamin C options that are less likely to cause irritation. If you’re a first timer like me, I would recommend those!
- Granactive Retinoid 2% in Squalane: Also a water-free suspension which also feels like an oil to me (extremely powerful anti-aging powers and improves skin texture). This product cannot be compared to regular retinoids (a derivitive of Vitamin A) as it uses a different molecule and technology. I chose this over the other the others because it was less likely to cause irritations which was my mistake with the Vitamin C as mentioned above. As a first timer, it is advised to apply a face oil or Vaseline after, as a calming element to reduce the risk of irritation which is what I did. Also, this product and other retinoid products are recommended for PM use as it causes the skin to be more photosensitive and more prone to sun damage. Waking up after my first night applying this product, I was incredibly impressed! I did not expect to see a difference overnight but my skin was visibly smoother! I would highly recommend a retinoid in your skin care routine but take note not to mix retinoids together.
Note:
- Retinoids work well with Ceramides and Hyaluronic Acid but not with Benzoyl Peroxide.
- Vaseline does not clog the pores as the particles are too big.
- I did not end up purchasing from The Ordinary website because their shipping costs a bomb. I made my purchase at: http://www.cultbeauty.co.uk
- Both Vitamin C and Granactive Retinoids are sensitive to UV rays and hence, should be stored in a cool dry place, away from any sunlight.
- Before use, I highly recommend consulting your dermatologist if you have sensitive skin and understanding both products.
I’d love to know your favourite product from the brand. Let me know! 🙂
Sheet Masks and Me: A 23 year love-hate relationship
This is the beginning of my love story with sheet masks…
For the past 23 years of my life, or at least since I started asking around for skincare recommendations and advice during my schooling days, every salesgirl, beauty consultant and makeup artist has told me I have such dry skin. I didn’t understand because I thought I was doing everything right (although not regularly applying skincare). I was lazy, taking my age for granted. Forgetting that prevention is key. Even committing to a once a week routine was a chore for me. On the rare occasion that I did manage to get a mask on, it was always such a bother that my face was sticky and my hair would stick to it. That being said, I never seemed to be anywhere close to reaching my goal of clear, flawless and glowing skin. It just didn’t seem economical to keep purchasing new products if I didn’t put in the effort. That was when I made the decision to really dedicate myself to my skincare routine. No more excuses, no more being lazy. Everyday I would:
- Day: Cleanse, Tone, Moisturize and Apply Sunblock
- Night: Remove dirt with Micellar Water, Cleansing Oil, Face Wash, Tone, Moisturize
But it still wasn’t enough! I was still getting comments on my dry skin. Then I read an article about the famous actress Fan Bing Bing who achieves such beautiful and flawless skin by applying 7 sheet masks a week. I decided to give it a go. I started out with 3 sheet masks a week and that was when I started seeing the difference. My skin was more hydrated and glowing, my complexion brightened and I look less tired! Now, I promote sheet masks to anyone asking about skin concerns (Trust me on this)!
So what exactly are sheet masks?
Sheet masks are basically sheets (paper/gel) infused in vitamin and nutrient rich serums for targeted skin care concerns.
Who should use sheet masks?
Anyone and everyone! However, if you have extremely sensitive skin or have skin allergies, do consult your dermatologist and get their recommendations.
When should you use a sheet mask?
Sheet masks can be applied at 2 different times, depending on your desired outcome:
- As the last step of your skincare routine before you go to bed: After cleansing, toning, applying your serum or essence and moisturizing, apply your desired sheet masks for roughly 15 – 20 minutes. Cleansing and Toning before applying the sheet masks help prepare your skin to absorb all the beautiful goodies the sheet mask has to offer. Applying the sheet mask after your serums and moisturizers helps to prevent them from evaporating into the air as sheet masks have lots of penetrating elements. It also helps to seal in all the benefits of the products applied beforehand, and adds benefits of its own!
- As the last step of your skincare routine before applying makeup: After cleansing, toning, applying your serum or essence, and moisturizing, apply a sheet mask. Remove after 15 minutes. For masks infused with serums in thinner and lighter textures, simply massage it into your skin in gentle circular motions for absorption. For those with thicker and heavier textures, wipe off the excess serum then proceed to apply makeup. Sheet masks (especially hydrating masks) help to smooth and soften the skin before makeup application, helping makeup to apply and sit better on the skin.
Which sheet masks should you apply?
Bear in mind that sheet masks are for targeted skin care concerns. Just chose one that would address the problem at hand. If ever in doubt or at a loss, always choose to hydrate! Hydration is the core of healthy and glowing skin.
How to apply sheet masks?
I love using sheet masks as a last step before I go to bed at night. It’s my favourite way to relax and pamper myself. Also because I never wake up early enough to squeeze it into my morning routine (haha). After cleansing, toning and moisturizing, I apply the sheet mask of my choice for roughly 15 – 20 minutes and remove it. I also always use the extra serum in the packets on my neck to my collarbone because I always neglect to care for that area (why waste?).
Things to AVOID:
- Do NOT leave the mask on for too long. Always read the directions on the packets before use. If the packets do not have English directions (something I always encounter!), 20 minutes is a safe time frame. Leaving sheet masks on too long can be counter productive as once the sheets begin to dry, they end up soaking back the moisture from your skin, leaving you back at square one, with dehydrated skin.
- Although not a must, is it not advisable to put your masks in the fridge. This is because a cold sheet mask might shrink the pores upon contact and not give the nutrient-filled serum enough time to penetrate into the pores and work their MAGIC!
- Masks containing alcohol or too much fragrances! Always check the ingredient list and if the alcohol is too high up on the ingredient list, put it back on the shelf where it belongs.
![IMG_E8262[1]](https://rebeccagemmasu.files.wordpress.com/2018/05/img_e82621.jpg?w=424&h=562)
My absolute favourite since I started using sheet masks more diligently: Honey Sheet Masks. I feel my skin responds really well to honey. The morning after, my skin feels really nourished, hydrated and bright!
The Reason
Since I was a school girl, I have always been fascinated by beauty magazines, achieving flawless skin and perfect eyebrows but BOY! was I lost and confused on my way!
I thought this interest was merely because I’m female (expected to be interested in beauty and skincare) but as I grew older and really listened to the other girls around me, I realized this is more of a passion! Many of the girls around me loved skincare and beauty but they didn’t care much for research or delving deeper, ending up purchasing many items serving the same purpose! Of all the research and textbooks i’ve been forced to study over the years, skincare and beauty are the only things I crave to learn more of and that my dear friends is why I have taken the plunge and am writing this blog!
Now, who am I you ask?
My name is Rebecca. I am a Marketing Executive/ Event Planner by day and a Beauty Junkie every other minute. I am no expert in beauty or skincare so let’s walk this journey together!
p.s. Sometimes I do like to try my hand in a bit of other things like baking, taking pretty pictures and writing about random things 🙂
![IMG_7842[2]](https://rebeccagemmasu.files.wordpress.com/2018/05/img_78422-e1527169369676.jpg?w=760)
The Journey Begins
Thanks for joining me!
Good company in a journey makes the way seem shorter. — Izaak Walton

